A place where I can leave my thoughts, ideas, and rants about anything and everything. From my hobbies and life to my pet peeves. Soon this will be just as cluttered as the inside of my head.
Showing posts with label restoration. Show all posts

Sunday, October 26, 2014

Problems with store bought handles

Very disappointed with the selection of axe and tool handles available now a days. I have been through five hardware stores and only walked away with three handles for projects at hand or for the possible future hafting jobs. I have ordered online and received decent handles but there was still flaws.

One of the biggest complaints is the grain orientation. The grain should be in line with the axe head to give the most strength and prevent cracking. The grain also shouldn't run out on the sides of the handle. 80% of the handles I have looked at, the grain was 45 degrees or worse.


Proper grain on left, poor orientation on right.

The second problem I have is the thickness of handles, I have purchased handles simply because they had great grain orientation but the handles were more useful as a baseball bat. These handles require work to thin them down, I have used a Dremel with a rasp bit, a four in hand rasp, spoke shave, and several sheets of rough sandpaper to work the handle down to fit comfortably in my hands.

My only theory for the thick handles is at the factory when they are changing cutters they are not aligning the cutter head back up properly. I have seen in the same stack of handles some will be thinner than the overly thick ones. Too bad most thin handles have poor grain orientation.

My future plans are to further equipment myself with the tools and skills necessary to produce my own handles. Will only then need a decent source to rough cut hickory timber or even some hickory trees that need to be removed. I believe with the amount of time I waste fixing a handle I could carved out my own.

True Temper Flint Edge restoration

My small collection of axes has been slowing growing. I wanted to get a boy's axe to fill in the size gap between the hatchets and camp axes to the full size felling axes. I lucked out and won a True Temper Flint Edge 2 1/4lb boys axe head on eBay. The head also had BSA marked on the opposite face making this axe have just a bit more history.  It looked as if someone took a angle grinder to the faces trying to remove the rust. There was grind marks all over both sides.


I had to remove the grind marks from the axe head, wished to been able to leave the patina alone but the grinding ruined that. I started with a hammer and a file to remove the small amount of mushrooming on the poll. Once that was worked down I started with 100 grit sandpaper to work the grind marks out. I worked all the way through 320 grit paper, using WD40 to help float the dust away. The head has a nice worn look to it and I finished it off with Johnson's paste wax to prevent rusting.


I had a 28" boy's axe handle floating around in the shop for awhile, I always pick up handles whenever I'm in a hardware store and find one worth getting. It's easier to pick them up as you find good ones than to go and hunt one down when you need it. Handle was fitted to the head and before mounting I gave the whole handle a good sanding with 80 grit paper. I wetted the handle down and went back over with 150 grit. Was real happy with finish sanding that I took two other axe handles and roughed them back down to repeat the same process. Smooth but not slick, I have the problem with over doing it. After mounting I gave all three handles a coat of stain. The next day they received their first coat of boiled linseed oil.


My dad really enjoyed this axe restoration, he was a boy scout when he was a young boy. He mentioned he is going to look for his hatchet he had when he was in the boy scouts which will be real treat for me. It is a real hot to breathe new life into a old tool, it's a disgrace to allow a tool to be abused and destroyed, but it's a even worse to clean one up to simple be a wall decoration. This axe will be put back to use when it is needed to complete a task.

Friday, October 10, 2014

Sanding tip

I have been sanding several handles lately getting the ready for axe or hammer heads and reconditioning old handles on equipment like my set of loppers that had varnish on them from the factory and have now lost most of the finish leaving the wood weathered and dry.

I usually scrape the handles with a old knife that I rolled the edge to turn it into a scraper. This removes the varnish finish and anything else stuck on the handle faster than trying to sand through it. After scraping I progress through various grits of sandpaper up to 220 which I feel is smooth enough but still provides some traction.


Sanding by hand fatigues my hands quickly, caused by trying to hold even pressure. I found that using a scrap piece of leather as a backer to the paper relieves some of the fatigue. I also don't worry about getting splinters anymore since my hand is protected by a 8oz thick piece of leather.


Monday, October 6, 2014

Keen Kutter hewing hatchet

Compared to a friend of mine I have a very small collection of axes and hatchets. For the past few years my friend has been haunting flea markets, estate sales, auctions, and even the local scrap metal recycling yards for old tools. His storage room contains piles of old rusty treasures waiting to be cleaned and restored. One day he showed me several of his newest finds; a couple double bit axes, a splitting mail, and about three chewing hatchets of varying condition.

My friend notice I took interest into one of the hewing hatchets, it was rusty but no pitting. I could barely make out the words "Keen Kutter" and knew he had a nice little gem. Few months later my friend asked me if I was still looking for a hewing hatchet and I told him I was still looking not being able to find one in decent shape he presented me with the Keen Kutter hatchet now cleaned up and handled, the handle was a cheap one that used to learn how to hang such a odd head shape.

My first task was to remove the handle he used. The grain was oriented wrong and it was just a overall piece of garbage. I worked the steel wedge out, chiseling around it to work it free. Chiseled the wood wedge out and had the head free from the now piece of firewood, might hold onto it in case I need to make something small.

For the handle I went to three different hardware stores to find one that was decent grain and shape. This reminds me to pick up decent handles as I find them even if I don't need them at that moment.


Now comes the labor intensive task of shaping the handle to fit the eye of the hatchet head. I started with the end rasping it down to just inside the eye. With that done I slowly worked the handle down until it was all the way through the head. I shaped the shoulder of the handle to match the profile of the lower ears. I seated the head on the handle and prepped the wedge, it was the one that came with the handle and I'm debating about removing it and replacing it with a longer taper wedge. Wedge was coated with boiled linseed oil and started into the handle. I worked the wedge down with a block of wood and a mallet until it stopped.


The handle is about 3/4" above the actual eye only surrounded by the upper ears. I checked and there is roughly a inch of wedge inside the head, it has not bottomed out in the saw kerf. I stopped pounding the wedge in because it was bulging the handle out around the ears and even cracked one side of the handle. I haven't put a metal wedge in yet since I haven't decided on removing the wood wedge or leaving it alone.


The handle sanded to remove machining rough marks and raised grain and was stained to match my other axe handles and allowed to dry over night. Couple days later I checked on it and the stain had dried. I wiped the handle down boiled linseed oil. I learned the next day that I should have wiped all the excess oil off because the handle was now a sticky mess. Using mineral spirits I wiped the handle down softening the excess buildup and removed it by wiping it with a clean towel.

Monday, September 29, 2014

David R. Burton drawknife restoration

Past couple of years I have been collecting and restoring antique tools back to usable condition. I have cleaned up Stanley planes, Plumb hatchets, hand screw clamps, hand saws, brace and bits, and a variety of other tools.

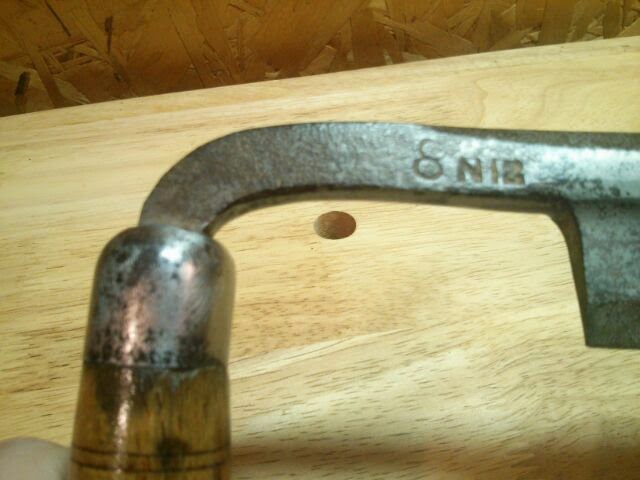
Last week I finished up cleaning a David R. Burton 8in drawknife. I own several drawknives but they either need replacement handles, or handles need to be tightened up on the tangs. This one was in the best condition out of the bunch and needed the least amount of work.

I never try to bring the tool back to 100% brand new shiny, the tool loses its history when someone does that. I only try to knock off the years of neglect, only removing what is necessary for the tool to perform as it should. Stains, bits of black rust, minor pitting, minor cracks in the wood all give the tool character. If I wanted something bright and shiny I would simply buy a new tool.


Unfortunately there are no before pictures, I need to quit forgetting to do before shots. The overall condition was ok, just several years of neglect sitting in a barn. The whole thing was covered in dust and grime. The steel was only lightly rusted, very little pitting. I used loctite naval jelly on the steel to remove most of the rust. The ferrules and end caps were sanded with 220 until most of crud was removed. The handles were scrapped to remove the old varnish and paint, then sanded to 220 grit paper. The handles were finished with four coats of tung oil finish with two coats of Johnson's paste wax.


I only need to remove the nicks out of the blade's edge and run it through the process of sharpening. Also need to make a leather mask for it.

Thursday, September 18, 2014

Razor cleaning

Had a coworker bring me a Gillette super speed razor and asked for to give it a good cleaning before he uses it. We settled on a small charge of $5 and the razor came home with me.

I enjoy cleaning the old razors, my collection has grown to 29 of various models, years, and even blade types. Something about bringing a old forgotten treasure back to life makes me happy. My method is to give it a scrubbing bubbles soak for a couple of minutes rinse and scrub with a toothbrush. Once more with the scrubbing bubbles to get rid of any last remaining bits of grime and final rinse and wiped down to dry. Sometimes I use a polishing compound that is safe with the nickel finish and give it a nice shine.


I returned the razor to my coworker and he was pleased with the results. Hope he enjoys his new addition for many years.

Handle maintenance

While in the shop working on the mold for my Altoids tin pouch I noticed my axe and hatchet handles looking a little dry. So I gathered them up and wiped the all down with boiled linseed oil. Also reminds me to make a couple more masks for the hatchets that are needing one.


I even got sidetracked enough to remove the handle from the hewing hatchet a friend gifted me. He was learning how to hang axe handles properly and didn't know the reason behind the single bevel. He ended up hanging the handle for a left handed person. Handle was junk anyways so I didn't mind chopping it out to hang it for my right handed self. My only question should I use a straight handle or a regular curved handle for the hewing hatchet? I bought a curved handle and my dad got me a straight handle so I have both to pick from.