A place where I can leave my thoughts, ideas, and rants about anything and everything. From my hobbies and life to my pet peeves. Soon this will be just as cluttered as the inside of my head.

Tuesday, September 30, 2014

Bark River Bushcrafter knife handle modification.

I liked the look of the finish Bark River puts on their micarta handles but I also had a fear that my hand would slip causing a serious cut due to how slippery the handle felt. I needed a way to remove the slippery feel but without changing anything else about the handle. I read on several forums that others had had the same problem and used either a Scott brite pad or regular sandpaper to remove the polished waxed.

This afternoon I had a few minutes so I tried a Scott brite pad first. Within minutes the glossy slippery finish was gone leaving a dull surface of the micarta scale handle. I sat there for the next several minutes washing the dust from the handle. After it was dry I rubbed the oil from my hands into the handle giving it a nice dull glow.

Before

After

I feel more confident while holding the knife now, knowing there is less of a chance for it to slip in my hands. The knife now looks like a trusty companion instead of a shelf display.

Proper set of carving knives

When I was younger I watched the Woodwright Shop on PBS every Saturday morning while the normal kids watched cartoons. I enjoyed watching Roy Underhill use the older tools turning a log into something. I remember the episodes that he had a guest on the show demonstrating their field of expertise.

One particular show was about carving spoons, I found it fascinating watching the guy rough out the shape of a spoon from a log with a hatchet. Few years later I caught the episode being shown again. I wasn't as young and had been given a Swiss Army knife as a birthday present. With the small blade I attempted to carve me a spoon out of a wooden dowel I had.

I did pretty well on most of the spoon up until it came to carving out the hollow space of the spoon. The flat blade of the knife didn't work so well in my inexperienced hands. The spoon ended up being more a scoop.

Years past after I given that spoon to my dad as a gift like many kids do. Recently my dad was cleaning out somethings from the old house and found a box of things I have given him over the years. Several of my Popsicle stick folding knives, a paper helicopter, a Lego hit and miss engine model, and the spoon I carved.

Seeing this I made up my mind that I wanted a proper set of carving knives including a spoon carving knife. I ordered a total of five knives over a few months. I ended up getting a Mora 106, Mora 120, Mora 122, Mora 164, and Flexcut kn12. I like the handles on the Mora knives, they fill my hand nicely without causing to much cramps or pains.


I have read that the Mora spoon knives are horrible out of the box and must be reprofiled and sharpened before use. With testing I did notice that it scraped the wood rather than slicing it. So it's currently being worked on. Need to make a few sticks to hold sandpaper of various grits to properly work the bevel, and a set to hone the inside of the curve.

Buying the knives and restoring the axes and other woodworking tools I learned I have inadequate means to sharpen everything. I discovered a two sides whet stone within my boxes of antique tools. I have recently made a leather strop out of a large paint stirring stick and a scrap of leather. I only need a finer grit stone and honing compound to go in the strop.

Monday, September 29, 2014

David R. Burton drawknife restoration

Past couple of years I have been collecting and restoring antique tools back to usable condition. I have cleaned up Stanley planes, Plumb hatchets, hand screw clamps, hand saws, brace and bits, and a variety of other tools.

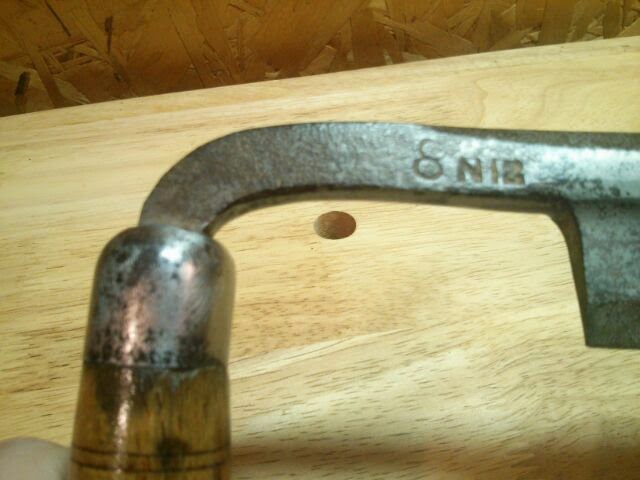
Last week I finished up cleaning a David R. Burton 8in drawknife. I own several drawknives but they either need replacement handles, or handles need to be tightened up on the tangs. This one was in the best condition out of the bunch and needed the least amount of work.

I never try to bring the tool back to 100% brand new shiny, the tool loses its history when someone does that. I only try to knock off the years of neglect, only removing what is necessary for the tool to perform as it should. Stains, bits of black rust, minor pitting, minor cracks in the wood all give the tool character. If I wanted something bright and shiny I would simply buy a new tool.


Unfortunately there are no before pictures, I need to quit forgetting to do before shots. The overall condition was ok, just several years of neglect sitting in a barn. The whole thing was covered in dust and grime. The steel was only lightly rusted, very little pitting. I used loctite naval jelly on the steel to remove most of the rust. The ferrules and end caps were sanded with 220 until most of crud was removed. The handles were scrapped to remove the old varnish and paint, then sanded to 220 grit paper. The handles were finished with four coats of tung oil finish with two coats of Johnson's paste wax.


I only need to remove the nicks out of the blade's edge and run it through the process of sharpening. Also need to make a leather mask for it.

Thursday, September 25, 2014

Training with bricks

With getting ready for my backpacking trip coming up I needed a way to get my back and legs accustom to the idea of wearing a thirty pound load most of the day. Back at basic training each time we went to the field or to a range, we would usually travel there by road march, each time we would go out the distance was further and the weight we carried increased. I had another bag I wasn't using for anything so I decided to take a idea from Go Ruck and use bricks for my weight.

Go Ruck challenges are events put on by former military for civilian and veterans to participate in. They seem like one day mini boot camp. The challenges help build Teamwork, leadership, camaraderie.would love to participate in a event sometime but I know I have a long way to go before I able to keep up.

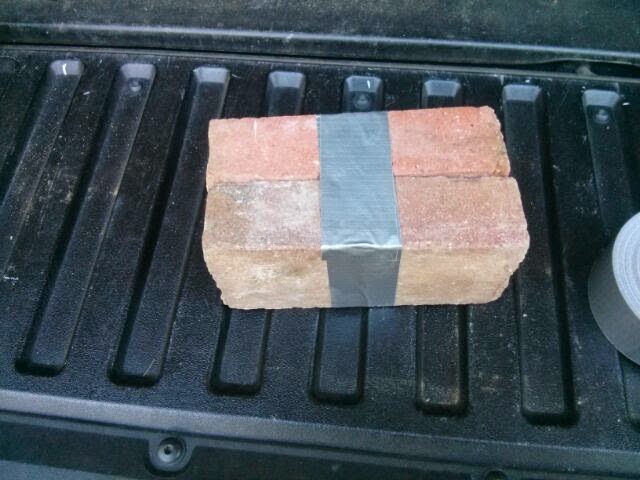
Each brick weighs between four to six pounds, depending on age and manufacturer. I needed to wrap the bricks to prevent abrasion damage to the inside of the pack.

Bricks selected and cleaned.
Pair is taped together.
I started by taping the bricks together with one wrap of tape. This is just to hold them together while I try to wrap them. I start from one in and wrap the bricks with one complete layer of tape.
First layer of tape done.
I then work on the ends, first by taping each corner and then each edge, this adds extra layers to where the bricks can do the most damage.
Corners reinforced.
Edges covered.
Once the corners and edges are covered I wrap the bricks with one layer end to end and a final third layer just like the first but in opposite direction.
Three pairs of bricks finished, three layers of tape per pair.
Bricks added to pack, towels surrounded the bricks to prevent movement.
Before adding the bricks to the bag, I padded the bottom with a old poncho liner I had, this protects the bottom from the bricks and lifts the weight up higher on my back. The bricks are added stacked on top of each other, I only used two pairs for now, will work my way up to the third pair. Old towels were stuffed in around the sides of the bricks to prevent movement and to help fill up the pack.
Pack ready to go.
All compress straps are tighten down, water bottles added to the external pocket and away I go to the designated route. Pack was comfortable overall, not use to this pack anymore so I had to find the sweet spots. Completing three miles I noticed my feet were hurting the most, no blisters but the joints in my feet were sore.

I need to continue to lose weight to help off set the extra weight I will be carrying. Will be carrying the weighted pack at least once a week along with my other routines.

Saturday, September 20, 2014

Investigating the local Crest Light

Friday night I went with our local paranormal investigation group S.A.P.I.T. to go to Lewisville, Arkansas and investigate the Crest Light. Also called the Lewisville light or Canfield light it shares a similar story to the lore famous Gurdon light that is also located here in south Arkansas.

My two friends that foundered the group led about ten people out for this little nightly adventure. The purpose of the trip was to get the new members a feel of what the group does and how they would react when something unexplainable happens. We took a variety of equipment including a EMF meter, a digital voice recorder, several digital cameras, and a few more pieces of equipment that I cannot recall, hope my friends don't get mad with me for forgetting.

We arrived after dark and spent little over a hour walking up and down the rail line. Those that had the equipment were getting various readings and those with cameras mad several pictures. There were also those that didn't take the trip seriously and tried to be melodramatic later on after we left.

I enjoyed my night with the group, we had a slightly eventful night with the light actually showing up for us. It wasn't as eventful as the light that we seen at Gurdon, Arkansas; but nonetheless it did make an appearance for us.

Thursday, September 18, 2014

Razor cleaning

Had a coworker bring me a Gillette super speed razor and asked for to give it a good cleaning before he uses it. We settled on a small charge of $5 and the razor came home with me.

I enjoy cleaning the old razors, my collection has grown to 29 of various models, years, and even blade types. Something about bringing a old forgotten treasure back to life makes me happy. My method is to give it a scrubbing bubbles soak for a couple of minutes rinse and scrub with a toothbrush. Once more with the scrubbing bubbles to get rid of any last remaining bits of grime and final rinse and wiped down to dry. Sometimes I use a polishing compound that is safe with the nickel finish and give it a nice shine.


I returned the razor to my coworker and he was pleased with the results. Hope he enjoys his new addition for many years.

Handle maintenance

While in the shop working on the mold for my Altoids tin pouch I noticed my axe and hatchet handles looking a little dry. So I gathered them up and wiped the all down with boiled linseed oil. Also reminds me to make a couple more masks for the hatchets that are needing one.


I even got sidetracked enough to remove the handle from the hewing hatchet a friend gifted me. He was learning how to hang axe handles properly and didn't know the reason behind the single bevel. He ended up hanging the handle for a left handed person. Handle was junk anyways so I didn't mind chopping it out to hang it for my right handed self. My only question should I use a straight handle or a regular curved handle for the hewing hatchet? I bought a curved handle and my dad got me a straight handle so I have both to pick from.

Belt pouch and fire kit

With the weather getting cooler my interest in camping and backpacking is rising. I'm also falling back into my interest in bushcraft. To be able to do somethings in the field without high-tech equipment is gratifying. Creating fire without matches or a lighter should be a skill everyone entering the woods needs to learn.

I wanted a nice way of carrying my fire kit with me. I started carrying everything in a tobacco tin in my bag which was great since it had a screw on lid with a gasket. But it was sometimes hard to open. I went to a Altoids tin so the kit would be smaller and I would carry it on my person instead of in the bag.

I took my carry option a step further with making myself a leather belt pouch for the Altiods tin. This was my first wet molded leather pouch, it came out okay but had several problems along the way creating the pouch. I learned not to use pine for the entire mold, at least not for the part that pulls the leather down on the shape of the pouch. I mounted the belt loops too low, having to cut and restitch them back on after the pouch was made was a pain in the butt. Forgot the thumb hole in the bottom of the pouch, this was needed to push the tin up out of the pouch. This hole was later useful to restitching the belt loops. I still need to finish staining the leather and waxing it but I'm waiting for the leather to fully dry. This was a great project for to learn more about leather working, it took entirely too long but I'm pleased with the results.


In my fire kit I have a light my fire brand fire steel, a small wrap of jute twine for tender. I also carry a piece of lighter pine and a slow match made from a .22 mag shell and cotton cord. The slow match has been useful around my friends that smoke, it's interesting to watch their reaction to me lighting it for them so they can light their cigarettes or pipe. The tin itself can be used to create char cloth, reason why the tin is blacked, although I don't normally carry any char cloth.


Monday, September 15, 2014

Too early to think about Christmas?

Yeah it's September and I'm already thinking about Christmas. Recently I have been thinking about Christmas ornaments, how my family has a tradition that each year my two sisters and I receive a new ornament from the hallmark series our parents started getting for us when we were younger. I have the classic car collection from hallmark and the number of ornaments is rather staggering when thinking of putting them all on the tree. Lately I have been trying to find a few ornaments to help mix up the selection, ones that show my hobbies and current interests. I have found two new additions for the tree, one for my interest in camping and another for a new favorite t.v. show Doctor Who. Also decided to make a ball ornament out of Lego, just need to order the pieces.

The Doctor Who Tradis ornament is by Kurt Adler and was purchased from Amazon, it is made from plastic and has great details of the tradis, there is also a blown glass version available but I wanted something that is a little more durable.  The backpack ornament was found on eBay, no clue who it was made by, it's made from resin and feels solid, it is hand sculptured judging by the irregularities.

I love my classic car series, but 20 something car ornaments on one tree seems a little boring to me, I recently have only been placing my favorites on the tree and have something in mind for the rest. I have been wanting to make a Christmas themed car show using the classic car ornaments ever since I started getting the series. I even have a few of the classic truck series. My current problem is where to put the display. With young nieces and nephew I want to keep it high enough so they won't think the ornaments are Matchbox or Hot Wheels.It also needs to be large enough to handle the amount of ornaments. I will work on this some more.

Lastly I have decided I new tree, my little six foot tree looks tiny with the eight foot ceilings. I thinking in getting a seven and a half foot tree to really fill in the room. I'm also needing more ideas on decorating the rest of my living room and the rest of the house.

Asinine challenges

Lately with the last winter's cold water challenge that makes participants jump into a pool of freezing water and now the ice bucket challenge to raise awareness to ALS, which the two challenges had nothing to do with each other. These have been spreading like wild fire, mostly because people are challenging others with little information on why they are doing it.

I have also been seeing several asinine challenges that narcissistic people have been coming up with just to get attention drawn to them. Of these I have seen the fire challenge, really a idiot standing in a shower pours lighter fluid on himself then lights the fluid on fire. The newest I have seen is the salt and ice challenge, kids pouring a mound of salt in their hands or on themselves somewhere and hold a ice cube on top of it for so many given time. Results are frostbite like symptoms and second to third degree burns.

So I present to you my own challenge, the lye challenge.


Yes I'm joking, do not attempt this under any circumstance. Even when Tyler Durden did it was fake, done with movie magic.

Endless miles

Lately I have been successful at getting back into shape and living healthy. I been walking the cross country track at the university at least once a week the distance is around three miles depending on the path you follow. Also been walking the small track located near work every morning after I get off of work, some mornings I even have coworkers accompany me. We usually do two or three laps not knowing to the actual distance of each lap. One coworker paced it out and said each lap was roughly 1800 feet. I have also just started going to the local state park and will try to do all three traipsing adds up to doing 3.25 miles.

With company I can tolerate doing the small treks to nowhere. Even when I'm alone as long as I have my earphones I can complete my task of walking the same path over and over again. I haven't worked up enough strength or endurance in my legs to starting running or even jogging, although I can do short distances. I have considered buying a bicycle just to another means of exercising. But I think I will grow bored with it, there are no places to enjoy riding a bicycle in my area other than along side of the road.

Small update on the vitamins I have been taking. The hydroxycut sx-7 has been returned to GNC after only three days of use. No problems with them other than the severe heartburn I will get even on a full stomach and horrible aftertaste from burps that taste like mustard.

The loss of a favorite hat

I recently lost one of my favorite ball cap to a Pizza Hut booth. It was a black and grey cloth mesh back with "Hooters" written in old English script across the front. Me and a friend went out to eat at Pizza Hut, we were both burned out on most other places due to daily routines with work. We sit down and ordered our pizza, once it arrived he bowed his head to say grace, I removed my hat to give both him and the Lord respect and placed it in my seat next to me. We are our dinner and got up to leave. I paid for dinner and we both left the restaurant. I had abandoned my hat, left it sitting there in the seat alone. I did not notice I was without my hat due to the fact I had grown out of the habit of wearing one during the summer. I had grown intolerable of wearing a hat because of how hot my head feels while wearing one. I finally noticed I was hatless a couple hours later while riding around with my friend. We returned to Pizza Hut to rescue my hat but discovered it had apparently found a new owner. The hat was missing from the booth and none of the employees seen it. So safe travels my old friend may you shade the sun from your new owners eyes and protect them from the weather.

Sunday, September 14, 2014

Enjoying the cooler weather

Past few days we have been experiencing cooler than normal weather, it also brought rain. Saturday except for the overcast it was a very pleasant day, it was in the mid 70's, perfect to be outside. I took advantage of the fall like weather and went to the local state park.

Logoly state park is one of those parks you don't hear about, mainly due to its small size and not much is there to attract people to come to it. It has three trails that add up to a distance of no more than 3.25 miles. It's main purpose is a education park teaching young people the various animals that live in the forest. I remember going to the park for field trips many times as a young student.

I took my day pack and went roaming the trails. Watched a duck swim around in the pond for awhile. There are a couple of geocaches out there, I failed at finding one and ran out of time to search for the other. I think I'm out of practice due to my summer hiatus from geocaching. There was also a birthday party going on near the visitor center and they were getting quite loud for such a little park.


Thursday, September 11, 2014

Robin Williams

Growing up like most kids my age I watched Nick at Nite and saw reruns of Mork and Mindy, Happy Days, grew up watching movies like Aladdin, Good Will Hunting, Jack, Good Morning Vietnam. I grew up watching Robin Williams, I laughed at his jokes and will surely miss him now that he is gone. The cause of his death doesn't matter to me, a great man is now gone and can never be replaced. Robin Williams was truly one of a kind.
 
Robin Williams
1951 - 2014

13 years ago

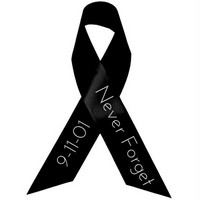
Today marks the 13th anniversary of the attacks on US soil; the Twin Towers, the Pentagon, and to flight 93. For most Americans today history has faded to nothing more for just another day, oblivious to all the lives we lost to acts of terror on our own soil. For others the pain is still felt as strong as it did 13 years ago. 13 years ago the world stood still and watched the horrific scenes play out on our TVs, our sense of security was lost.


Wednesday, September 10, 2014

Modification made to knife sheath

Last year I purchased a Bark River Bushcrafter off of eBay. Great knife, it has been out with me on a lot of day trips. Only complaint I have is the sheath that came with it. The sheath was made by Sharpshooter, which the sheath itself is a great quality sheath, but it's useless when paired with a hip belt on a backpack. The belt loop makes the knife ride high and interferes with the hip belt. Knowing that I wanted to carry the Bushcrafter with me on my overnight camping trips I started looking into what others have done.

Most obvious option was to add a dangler belt loop to the sheath so the knife would ride below the hip belt. So I dug out my leather tools and scraps of leather and started laying out a design to modify the sheath. I had some stainless steel rings I picked up at a feed store, had to cut the weld open to get it on the current belt loop on the sheath, now wishing I just cut the stitching and redo it. Took a strip of 8oz leather and measured for the width of the belt I usually use and for the loop for the ring. Dressed the leather while it was flat, leaving a few spots bare where the contact cement would be applied. Looped the leather around the ring and glued everything together, finished by stitching the three layers together. After I was happy with the fit I glued down the old belt loop and stitched it down. The new belt loop and whole sheath was waxed which darkened the leather and blended the color difference.
Pictured before reinforcing stitching was made on old belt loop.

Pictured with the other tools I usually bring with me.

Monday, September 1, 2014

Single use antibiotic ointment packet

There is a lot of great information out on the internet, most is hard to find due to the amount of useless crap cluttering the search results. One small idea was learned from reading a blog by Brian Green, he is a avid backpacker and has done some really great gear reviews. I would like share a great idea he posted, a single use antibiotic packet.

I have a first aid kit in my pack that had a couple of antibiotic ointment packets, they are fairly large with way more ointment then one would use in a single cut or blister. I hate to be wasteful and decided to look for a better option. Using a drinking straw you can make a very small packet of antibiotic ointment. For instructions on making these check out his blog. I have made about seven from one straw and have them in a small plastic bag in case one does burst by accident.