A place where I can leave my thoughts, ideas, and rants about anything and everything. From my hobbies and life to my pet peeves. Soon this will be just as cluttered as the inside of my head.

Tuesday, November 7, 2017

Fortis Binary pattern Leman Russ, Part 2


     If you decided that you don't want to add side sponsons you are actually finished with the conversion, only thing left to do is add the Chimera side pieces and tracks on as normal and to complete the tank with all the rest of the various Chimera and Leman Russ parts. However if you have decided that you do wish to have side sponsons on your Fortis Binary pattern Leman Russ I will do my best to explain how to do so.

     As mentioned earlier in part 1, the older and newer Chimera kits comes with completely different pieces for the side track parts. It is better to simply show you the difference. As you can see the newer kits the out side piece is molded into one piece, where as the older kit was made up of three different pieces. I used the fact that the older kit was made like this to my advantage since it will be easier to trim away the small raised rectangle than to have to completely remove the case cover.


Step 1 | Step 2

Step 2: adding side sponsons.

     We will start with the main set of parts that needs to be modified, the two outer side pieces and the two side covers.


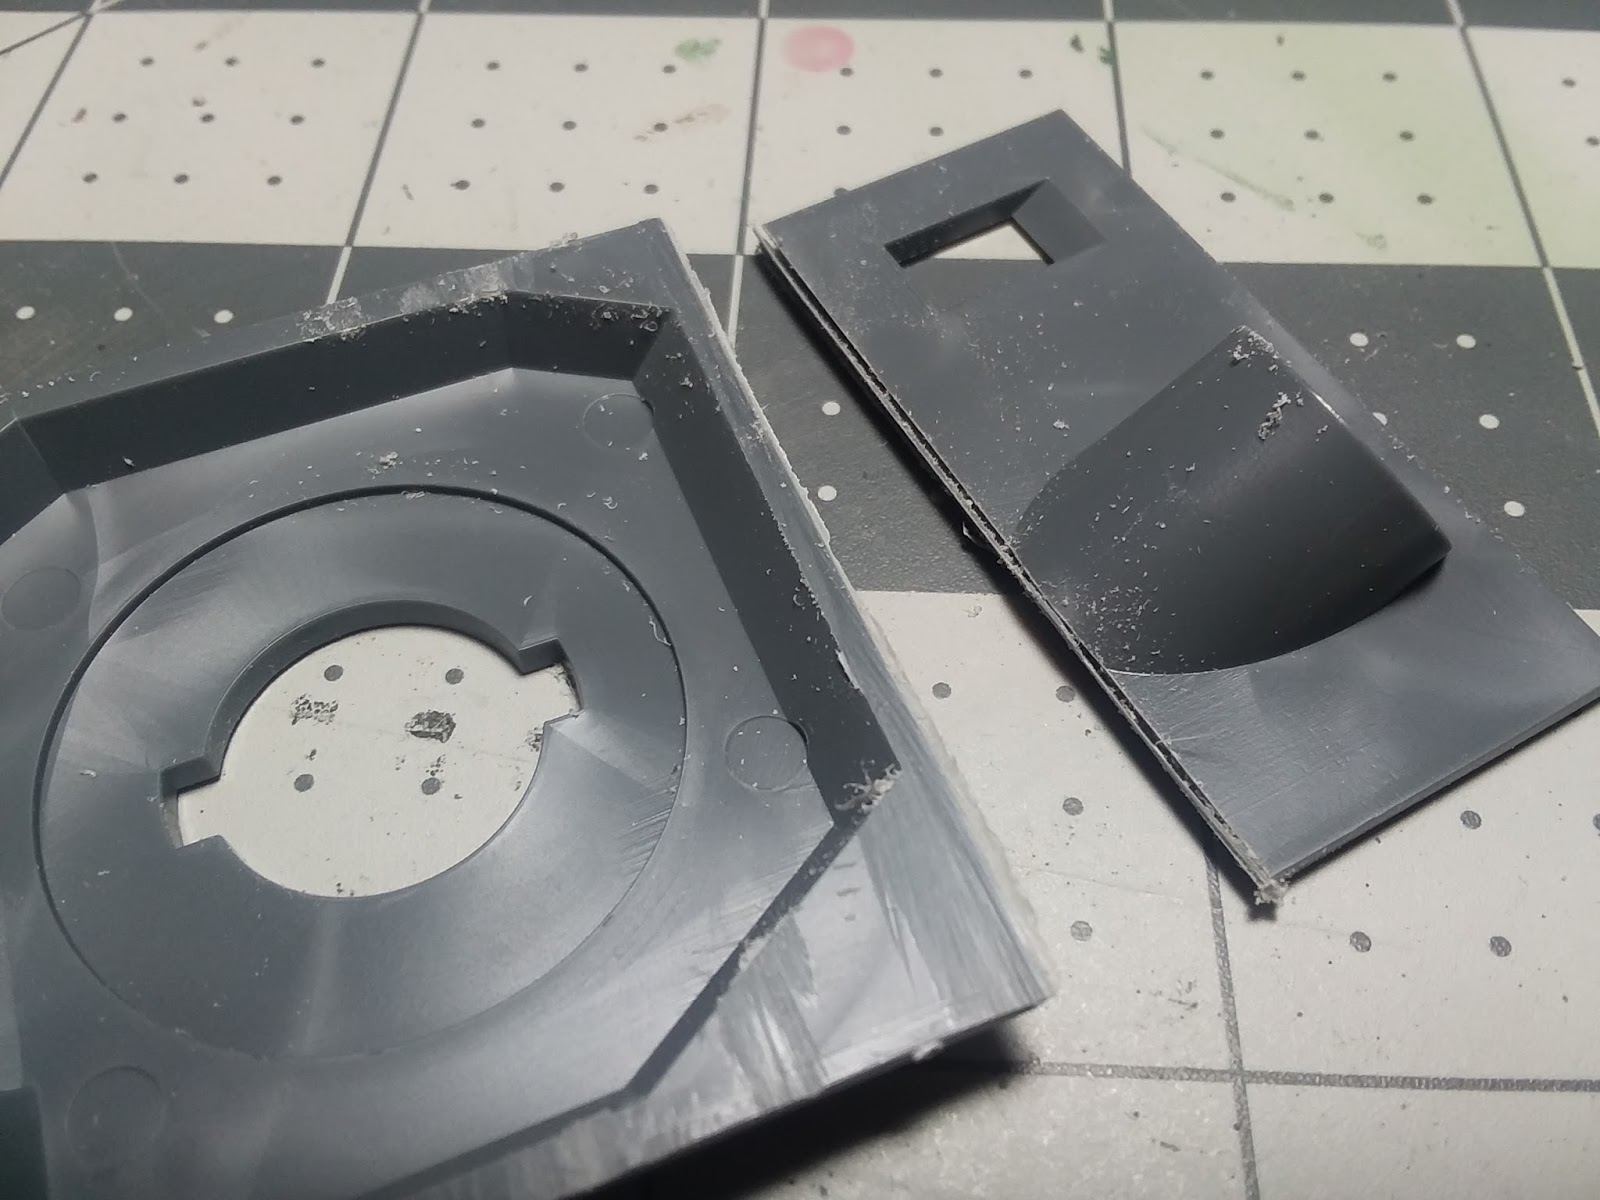
     The side pieces has a rasied rectangle that the hatch cover would attach to, this is where we are going to be putting our side sponsons so we need to shave this rectangle down flush with the surrounding area. You can use sandpaper, a dremel, or a Xacto knife. I used the small Xacto chisel blade to shave this down, take your time with this and you don't want to go too deep into the plastic just flush with the surface, be careful not to damage any of the surrounding details.


     The next thing we need to do is modify the side covers so the side sponsons will have room to attach and have enough clearance. Take either your hobby knife or razor saw and cut at the seam as shown in the pictures. Clean the cut areas with sandpaper and set aside for now.


     At this time go ahead and assemble your side sponsons as normal following the instructions from Games Workshop. Once completed you will notice that the side covers are too think to allow full range of travel for the sponsons weapons. We will need to thin the covers down to gain clearance for the weapons.


     I cut mine so that they were just under 1/8" thick, use your sponson assembly as a guide to ensure you are going to have enough clearance to have full range of motion from the weapon rotating in the sponson. An easy way to uniform cuts on your covers is to lay your blade on something that is as thick as you want your covers to be and have the covers faced down when you draw your blade across the sides.


      Once your scored your lines, take a fresh knife blade and follow the scored lines, work around the pieces until you cut the excess free from the covers.


     Now to test fit the side sponsons and the covers to our outer side pieces. You may want to remove the rivets that interfere with the top edge of the sponson to close the gap they cause between the sponsons and the side pieces. This goes for the top front rivet that will cause a gap between the sponsons and the side covers.


     That completes the tutorial, finish the tank by applying the rest of the parts as normal following the insturctions. Add your wheels that act as spacers and attach the track pieces. I skipped several of the wheels to use them later for other projects, I used bits of sprue to help glue the tracks to the tank.

     I have enjoyed creating this tutorial for everyone that had showed interest in the model that I made. Hopefully I have inspired some as much as I have been while seeing others creations.


Step 1 | Step 2

Fortis Binary pattern Leman Russ, Part 1

     After being liberated from the forces of Chaos, Fortis Binary began working on a prototype Leman Russ battle tank. Once they completed the construction of the tank they named it the Gaunt Mk1 after Colonel-Commissar Ibram Gaunt who led the Imperial Guard strike team.


      I received several requests to show how I made this model. To be honest I'm not the first that came up with the idea to combine a Leman Russ and a Chimera. It would be a dishonor not to mention those that gave me the inspiration for creating my own version of the Leman Russ Chimera hybrid.

13th Royal Praetorian Rifles 
Mordian 7th Regiment Charon pattern Leman Russ
Pick a Damn Army AT70 Bloodpact tank

     Some tools needed that will help make the conversion easier. The large and small xacto chisel blades were used extensively to shave down raised bits of plastic such as the inside alignment ridges on the Chimera track sides.


Step 1 | Step 2

Step 1: Building the Hull.

     You will need the four pieces pictured: the upper and lower Leman Russ hull and the upper and lower front hull pieces from the Chimera.


     The front of the Leman Russ hull will not be needed so it needs to be removed. Flip the piece upside down and lay your hobby saw flat. You want to cut at the top front corner from the inside of the piece with the saw.


     Next we need to remove a bit from the back of the Leman Russ hull. Measure 5/32" from the bottom of the hull and trim this piece off. Sand the edge smooth, you may have to sand a bit more off the edge to get everything to align up later on when assembling the pieces. Test fit the hull piece in before gluing.


    I took the piece that is used in the Chimera kit when building a Basilisk and trimmed the small edge off to make spacers for the Leman Russ hull, these will give more gluing surface and help align the modified hull to the Chimera track sides.


     Assemble the two Chimera hull pieces as normal. At this time shave off the back row of rivets from the hull piece, this is where the Leman Russ hull will mate to the Chimera. You can go ahead and place your hatch and access door panels on the hull so you can use them to help check for fitting issues.

    Using the Leman Russ lower hull piece measure from the rear 1 15/32" cut the piece out as shown, this will be the extended floor plate that will fill the gap between the Chimera hull and the bottom edge of the Leman Russ hull. The bottom of the plate has four ridges that run the length of the plate, at the recent cut edge, measure 1/8" and trim the ridges off. This is where the plate will mate to the Chimera floor plate lip.


     Its time to join the upper and lower halves together. Before gluing, check for fitment. Adjust anything before proceeding. You may notice that the Leman Russ is slightly wider than the Chimera, if so take this time to carefully sand the edges down so that everything is the same width. I laid a piece of 120 grit sandpaper on the table and stood the hull on its side and while keeping even pressure I slowly sanded down both sides equally. I would only do a couple passes on the sandpaper and continuously checked my progress until I was happy with the fit.


     The rear of the hull will not be covered by the Chimera track sides so we must fill in the gaps with plastic card, I used a old debit card I had so don't mind the printing. This was the most frustrating part of the build for me since I never used plastic card before, just take your time and try to cut the angles as precise as possible, I will be filling the gaps will liquid green stuff before painting to hide my mistakes.


     Last thing we need to do is trim the inside surface of the Chimera track sides to fit the newly created hull. Remove everything you see in the picture, there were two rollers and the ridge that I removed, I also had the remove some of the inner ridges due to fitment issues with the plastic card gap filler. Once again take your time with this, I used a large and small Xacto chisel blades to shave the ridges off and went back over the area with a sanding file (nail files are great with small details like this).


     There are two version of the Chimera model the older one that used the wheels as spacers on the newer kit that only has four pins to space the two halves. If you are wanting to have side sponsons its easier to modify the older side pieces because the outer case covers were made separate and the track piece only had a small rectangle that needed to be trimmed down for the sponson to fit. I will be covering the steps needed to modify the sides so a Leman Russ sponson will fit. If you do not wish to have side sponsons, use either new or old Chimera track sides as instructed and no further modification is needed.


Step 1 | Step 2